Added to Basket
Published 13/10/2025

How to use the ProCook Barista Bean to Cup Espresso Coffee Machine

Barista quality coffee at home has never been easier with our ProCook Barista Bean to Cup Espresso Coffee Machine.

Part of our coffee machine range, our ProCook Barista Bean to Cup Espresso Coffee Machine features an easy-to-use display screen, complete set of coffee accessories and integrated conical burr grinder. We also have the ProCook Espresso Coffee Machine and ProCook Barista Elite Bean to Cup Espresso Coffee Machine.

Blending high performance with ease, the Barista Bean to Cup Espresso Coffee Machine takes you through the entire coffee-making process – grinding, brewing, frothing – so you can easily recreate your preferred coffee drink within the comfort of your own home.

Understanding the ProCook Barista Bean to Cup Espresso Coffee Machine

Familiarising yourself with the coffee machine is essential. We recommend watching our video on the ProCook Barista Bean to Cup Espresso Coffee Machine and reading through the instruction manual before brewing your first cup of coffee.

Core components of the coffee machine

Most coffee machines will have the same components, with only a few slight differences. The ProCook Barista Bean to Cup Espresso Coffee Machine has the following features:

Bean hopper: The bean hopper is the compartment attached to the top of the coffee machine and where you put whole coffee beans, storing them in an airtight container.

Burr grinder: This integrated burr grinder ensures you get the very best ground coffee.

Tamper: A weighted coffee accessory that’s used to compress ground coffee into a dense disc (sometimes called a “puck”) inside a portafilter.

Group head: The group head is found at the front of an espresso machine and where the portafilter locks in.

Portafilter: A handle that holds the coffee grounds in a filter basket used to brew espresso. It fits into the group head.

Filter basket: A metal basket that holds the ground coffee in the portafilter.

Core components of the coffee machine (continued)

Bracket: A place to insert the portafilter while the burr grinder grinds the beans. The bracket will keep the portafilter stable while it collects the ground coffee.

Steam wand: A long, metal nozzle attached to the coffee machine and used to make textured coffee for lattes, flat whites, cappuccinos, etc.

Water tank: A removable plastic tank usually found at the back of a coffee machine used to store water needed for brewing coffee.

Drip tray: Designed to catch coffee drips and spills from the coffee brewing process. Prevents messes on your countertops.

Before first use

Once you’re familiar with your coffee machine, it’s time to use it. If this is the first time using the machine or you haven’t used it in a while, we recommend the following instructions.

  1. Remove all packaging materials, tape and stickers. Check all parts are there and not damaged.

  2. Remove the water tank from the machine and discard the rubber plug found where the water tank and machine connect. Pour 2 litres of cold tap water into the tank and return to the back of the machine, making sure it is flush and locked into position.

  3. Add the empty bean hopper to the top of the conical burr grinder – rotate clockwise to lock. Rotate the bean hopper to medium grind size (15).

  4. Insert the single-cup filter basket to the portafilter and hold to the left of the group head. Insert the portafilter into the group head at a 45-degree angle and rotate anticlockwise to lock tightly in place.

  5. Put the steam wand lever in the upright position.

  6. Plug in the coffee machine and turn it on by pressing the power button. All the buttons will flash while the machine is in a preheating mode. Once preheating is finished, all buttons will be on.

  7. Place a container under the group head and steam wand, so you can do an initial rinse cycle before making your first shot of espresso.

  8. From the ‘Settings’ menu, select ‘Descaling’ and hit ‘Start’ to start descaling. Ignore the prompt to add white vinegar or descaler. Continue following the instructions on the display.

  9. Once the descaling is complete, remove the containers under the steam wand and group head, emptying them.

  10. Remove the water tank, empty and rinse before refilling with fresh water. Return the water tank to its locked position.

  11. If there’s water in the drip tray, slide it towards you, lift the grill and empty.

Brewing the perfect espresso

Once you’ve unpackaged and rinsed through the coffee machine, it’s time to brew your first shot of espresso.

  1. Fill the bean hopper with your choice of beans. Avoid completely filling the hopper. Adjust the hopper, selecting your preferred grind setting by rotating the bean hopper - for a smooth, rich espresso, we recommend the coarseness setting of 3.

  2. From the display screen, select your desired coffee. Each coffee type will have a coffee bean symbol, indicating which filter basket to use. A single bean = single cup filter, whereas a double bean = double cup filter.

  3. Take the correct filter basket and insert into the portafilter. Slot the portafilter into the bracket and press ‘Select’ to start grinding the coffee beans. We recommend 8 seconds of grinding for the single cup filter and 11 seconds for the double cup filter if using a coarseness setting of 3. Grinding times can be changed in the ‘Settings.’

  4. Tamp the coffee, making sure to use it firmly until it is level with the top of the filter basket.

Brewing the perfect espresso (continued)

  1. Insert the portafilter into the group head and turn anticlockwise, locking it into place. Place your mug underneath and press ‘Select’ to start the brewing process.

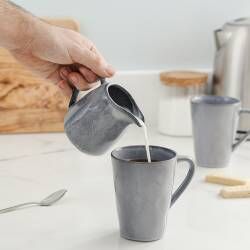
  2. If you have chosen a coffee that requires milk or dairy-free alternatives, pour approximately 100ml into the milk jug. Once the coffee has finished brewing, the display will prompt you to start the milk foam process. Place the jug under the steam wand and pull the steam wand lever forward.

  3. Submerge the steam wand just below the milk’s surface. A hissing sound will start as the milk begins to froth. Once the milk is very hot, turn off the steam wand by returning the steam wand lever to its central, upright position. Remove the steam wand from the milk jug, wiping it down with a cloth to remove milk residue.

  4. Pour the milk into your coffee and enjoy your drink.

Descaling your coffee machine

The display screen will prompt you to descale your coffee machine after every 300 cups of use. However, if you live in a hard water area, you may need to descale more frequently.

  1. From the Settings menu, select ‘Descaling’. You will be guided through the steps.

  2. Place a 1 litre container under the group head and steam wand.

  3. Fill the water tank with 1.5 litres of water and add 70ml of liquid coffee machine descaler or white vinegar.

  4. Move the steam wand lever forward – be careful as steam will come out.

  5. When ready, click ‘Select’ to start the descaling process.

  6. Once it’s complete, return the steam wand lever to its upright position, remove the water tank and rinse thoroughly before refilling with fresh water.

Cleaning and caring for your coffee machine

Proper care and cleaning can keep your coffee machine working properly and producing the very best coffee.

  • Do not put any detachable parts in the dishwasher

  • Avoid using coarse sponges, alcohol and abrasive detergents and cleaners

  • Never immerse the machine in water

  • Wipe down the coffee machine’s exterior with a slightly damp cloth

  • Dry all coffee machine parts before assembling and switching the machine on

  • Use the supplied cleaning brushes to help clean specific parts of the machine

  • Insert the thicker prong of the cleaning pin into the end of the steam wand’s nozzle to remove milk residue

  • Remove the end of the steam wand’s nozzle and twisting clockwise and wash with warm, soapy water

  • Gently pull the drip tray towards you and lift the metal grill to clean it

  • Use the thinner prong on the cleaning pin to clear any blocked holes in the filter baskets

    Building a sustainable future

    B Corporation Certified

    ProCook is proud to be certified as a B Corp™, joining a select but growing group of companies committed to using business as a force for good.

    Learn more

    ProCook is honoured to be recognised as a Which? Recommended Provider for Furniture and Homewares. When you purchase from us, you can rest assured that you're getting a truly exceptional product that has been carefully crafted to meet your every need.

    Life's A Beach

    ProCook is dedicated to supporting our long-term charity partner's mission to inspire action to reduce single use plastics. Together, we're striving to make a positive impact on the environment and create a sustainable future.

    Learn more